iOS VPN client implementation demo based on iOS9 NetworkExtension NETunnelProvider APIs
Apple released a new version of Network Extension since iOS9, which allows us to implement our own VPN protocol. This repo provides a simple demo using Network Extension with Swift 3.
Server side demo is here.
This demo and server side demo are extremely simplified and only for demonstration purposes, a lot of stuff are hard coded. Further design and elaboration are required if you want apply this demo to your app.
Inspired by ShadowVPN-iOS.
~First, you need to request NetworkExtension entitlement for your Apple ID from Apple by filling the form here: https://developer.apple.com/contact/network-extension. From my experience, it gonna take 2-6 weeks for Apple to process your request.~ 2017-12-16 Update: This is no longer needed.
Then you need an iPhone. Network Extension App cannot run in iOS Simulators, you need a real iPhone to debug.
Login Apple developer portal, register 2 new App IDs, one for App target and another for NetworkExtension tunnel target. And make sure App Groups and Network Extensions are checked in App Services section.
Register an App Group in developer portal as well
Then, again in App IDs section of developer portal, edit the 2 App IDs you created at 3rd step, configure App Groups to the app group you created at 4th step.
Also in developer portal, generate 2 iOS App Development provision profiles for the 2 App IDs created before, ~make sure ~ (2017-12-27 Update: This is probably not needed as well). Then download them and save them to disk.Network Extension entitlement is selected on ‘Do you need additional entitlements?’ page
Open this xcodeproj with XCode, select NEPacketTunnelVPNDemo target, in General > Identity section, change Bundle Identifier to App ID you created. Then import profiles you generated in General > Signing (Debug) section and General > Signing (Release) section.
Do the same thing for NEPacketTunnelVPNDemoTunnel target.
Find a Linux machine, build and run simple-vpn-demo, fill its IP address to ViewController.swift.
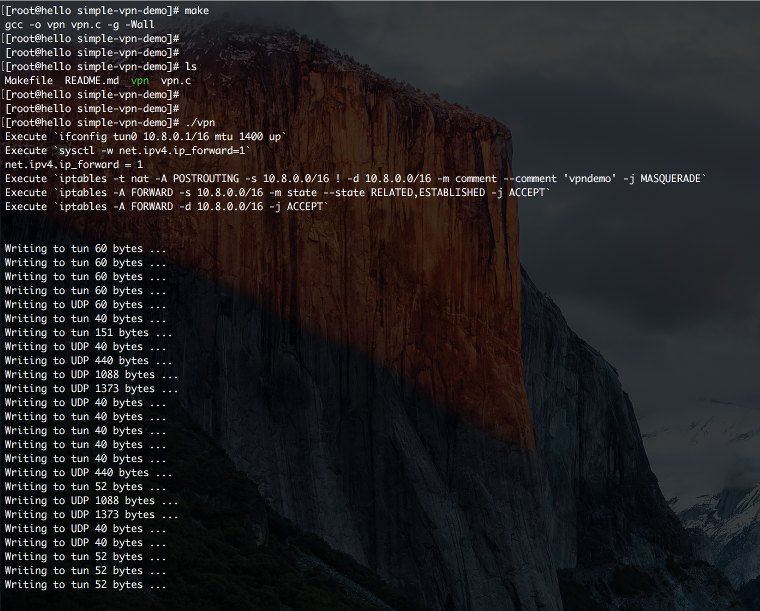
After build & run simple-vpn-demo, your terminal should be like this.
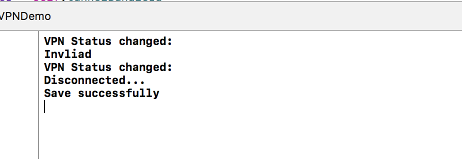
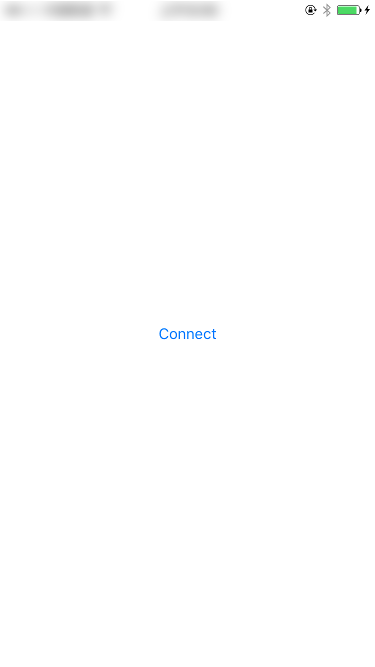
After build & run NEPacketTunnelVPNDemo on your iPhone, Xcode log window should look like this, iPhone screen should look like this.
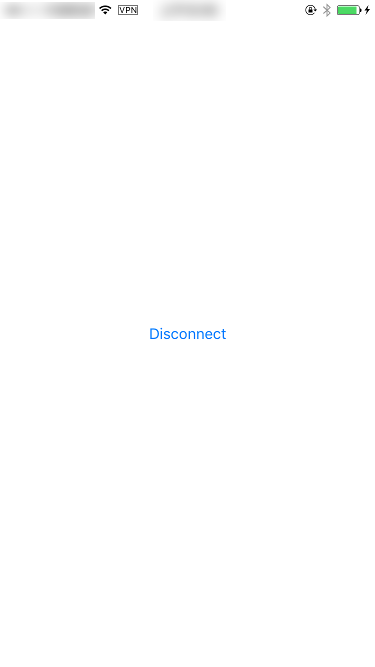
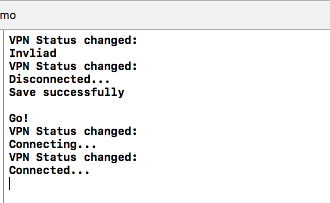
The Connect at the center of iPhone screen is a BUTTON, after you click it, your iPhone screen should look like this, and Xcode log window should look like this. simple-vpn-demo terminal window should look like this, which means VPN server is now receiving traffic.
Your IP address displaying on http://whatismyipaddress.com/ on your iPhone should be different before and after click the Connect button. thus Q.E.D.